The INEOS Grenadier uses three differential locks: a mechanical center lock in the transfer case and two optional electronic cross-axle lockers (front and rear) supplied by Eaton. On paper, it's a proper old-school 4WD drivetrain with real mechanical locking. In practice, owners have spent two years figuring out the quirks.
The center lock is excellent. Mechanical, reliable, usable at speed. The electronic cross-axle lockers are a different story. They work, but the engagement procedure trips up new owners, the dashboard indicators are misleading, and the electronic control logic has real limitations that show up at the worst possible times.
This guide covers the full system: what each locker does, the exact procedure for engaging and disengaging them, what the dashboard lights actually mean, and what happens when the electronics and the terrain disagree.
What's in the system: 1 mechanical center lock (transfer case lever) + 2 optional electronic cross-axle Eaton E-Lockers (front + rear, overhead buttons).
Engagement order: off-road mode → low range + center lock → rear locker → front locker. You cannot skip steps — rear requires center, front requires both.
Speed limits: Engage E-Lockers at 3 mph or less. Do not exceed 20 mph with cross-axle lockers engaged. Center diff lock alone is usable at highway speed.
Aftermarket retrofit: Not available. There is no aftermarket locking differential for the Carraro axles, so if you skip lockers at build, you likely can't add them later. The Trialmaster trim is the easiest factory path to the triple-locker spec.
System Architecture: Three Differentials, Two Technologies
The Grenadier is permanent four-wheel drive. Power flows from the BMW B57 3.0L inline-six diesel (249 hp / 550 Nm), or the B58 petrol (281 hp / 450 Nm, limited availability in most markets), through the ZF 8HP 8-speed automatic to a Tremec two-speed, manually operated transfer case, which splits torque between front and rear axles. Both axles are solid (live) axles with Carraro-supplied differentials (4.10:1 ratio). CV joints and propshafts are supplied by Dana Spicer.
Axles: Carraro — over 50 years making heavy-duty tractor axles for John Deere, Claas, and other OEMs. The Grenadier uses 8 axle configurations (LHD/RHD × open/E-Locker). Source
Transfer case: Tremec two-speed, manually operated. Low range ratio: 2.5:1. Source
Differential ratio: 4.10:1. Source
Crawl ratio: 53.8:1 (1st gear 5.25 × low range 2.5 × axle 4.10)
CV joints & propshafts: Dana Spicer
There are three separate differentials, and each one can be locked independently:
| Component | Type | Engagement | What It Does |
|---|---|---|---|
| Center Diff (Transfer Case) | Mechanical dog-clutch | Manual lever | Locks front-to-rear torque split at 50/50 |
| Rear Cross-Axle Diff | Eaton E-Locker | Electronic button (overhead panel) | Locks left-to-right rear wheels together |
| Front Cross-Axle Diff | Eaton E-Locker | Electronic button (overhead panel) | Locks left-to-right front wheels together |
An open (unlocked) differential sends torque to the wheel with the least traction. If one wheel is on ice and the other on rock, all the engine's torque goes to the ice wheel. It spins freely, and you go nowhere. Locking the differential forces both wheels on that axle to turn together, so the wheel on rock gets drive even though the wheel on ice has no grip.
What Each Lock Level Gets You
Open diffs only. Any single wheel losing grip can leave you stuck.
Center locked. One front and one rear wheel must both lose grip to stop you.
All three locked. Every wheel gets equal drive. You only stop when all four lose traction.
How to Use the Differential Lockers: Step by Step
This is the section most owners need and most manuals don't explain clearly enough. The Grenadier's locker engagement follows a strict sequence, and getting it wrong results in error lights and frustration.
Engagement Sequence
The lockers must be engaged in order: center first, then rear, then front. You cannot skip steps.
Activate Off-Road Mode
Press the off-road mode button on the center console. It requires a second press to confirm (this catches people off guard, as few other controls on the Grenadier require a two-press confirmation). Off-road mode adjusts throttle response, traction control, and hill descent parameters. Per the manual, the handbrake must be engaged to activate off-road mode.
Shift to Low Range + Lock Center Diff
The transfer case lever moves in a square pattern. High range is top-left, high-locked is top-right. Low range is bottom-left, low-locked is bottom-right. Move straight across (left to right) or straight down, never diagonally. Per the owner's manual, the transfer case must be shifted while stationary, in neutral. If the lever grinds, stop, let the vehicle roll forward or backward a few inches, and try again. This is a mechanical dog-clutch, so the teeth need to align.
Some dealers advise shifting the transfer case "while rolling at 1-2 mph." This directly contradicts the owner's manual, which specifies stationary + neutral. In practice, many owners find a slight roll helps the dog-clutch teeth align — but be aware this is off-label. Forum discussion
Engage Rear Diff Lock
With the center diff locked, press and hold the rear differential lock button on the overhead panel for about one second. The indicator light will flash. You need to be moving (even slowly) for it to engage. The locker physically engages within about one wheel rotation. The light will go solid once wheel speed sensors confirm the lock. If you're stationary on a low-grip surface, creep forward a few meters. The E-Lockers require center diff locked first — rear before front, sequential order.
Engage Front Diff Lock (If Needed)
Same procedure as rear. Press and hold the front lock button. The front locker requires the center and rear to already be locked — you cannot skip the rear. Again, the vehicle needs to be moving for engagement. Front locking is rarely needed outside of genuine rock crawling or severe cross-axle situations. Forum reference
When to Use Which Configuration
Gravel / Fire Roads / Light Snow
Center diff lock only. High range. This is your everyday off-pavement setting. Safe at speed, reliable, and the most commonly used configuration.
Mud / Wet Clay / Slippery Hills
Center locked + rear locked. Low range. The rear locker prevents single-wheel spin on the drive axle, which is where you lose traction first on slippery climbs.
Rock Crawling / Severe Ruts
All three locked. Low range. When wheels are lifting off the ground or you're getting cross-axle articulation, you need all four wheels driving. This is the only configuration that guarantees it.
Towing Off-Road
Center locked + rear locked at minimum. Several owners report the lockers are most valuable when towing heavy loads off-road, where you can't afford to lose momentum while the traction control system decides what to do.
Disengagement Procedure
Unlock in reverse order: front first, then rear, then center. The procedure is straightforward, but the dashboard indicators create confusion.
Press the Front Lock Button to Disengage
The light will start flashing. The locker physically disengages quickly (within one wheel rotation), but the light stays flashing until the wheel speed sensors detect a speed difference between left and right wheels. On a straight track with low traction, this can take a surprisingly long time.
Press the Rear Lock Button to Disengage
Same behavior. The flashing light doesn't mean the locker is stuck. It means the ECU hasn't confirmed disengagement via wheel speed sensors yet. Making a turn will generate the speed difference needed for confirmation.
Unlock Center Diff / Shift to High Range
Wait until the rear diff lock indicator stops flashing before moving the transfer case lever. The recommended sequence is: low-locked to low-unlocked, then to high-unlocked. Going directly from low-locked to high-locked is not recommended as it can cause binding.
Many owners report that the diff locks "won't disengage." In most cases, the lockers have mechanically disengaged, but the indicator light is still flashing because the vehicle is driving straight on a low-grip surface and the wheel speed sensors can't detect a difference between left and right wheels. Drive forward and make a gentle turn. The light will go out.
Dashboard Indicators: What the Lights Actually Mean
The locker indicator lights are the single biggest source of owner confusion. Here's what each state means:
Solid Light
The ECU has confirmed the locker is engaged. Wheel speed sensors show both wheels on that axle turning at the same speed. You're locked.
Flashing Light
This does NOT mean the locker failed. It means the ECU cannot confirm lock status because the wheel speed sensors haven't detected the right conditions yet. The locker may already be physically engaged. You probably need to drive forward a short distance or make a slight turn.
Light Off
ECU confirms the locker is disengaged. Wheel speed sensors detected a speed difference between left and right wheels.
One experienced forum member provided the clearest explanation of what's happening under the hood:
MY24+ Software Update: "Change of Mind"
A software update for MY24+ vehicles allows owners to re-engage the lockers while the indicator light is still flashing after a disengage command. Previously, you had to wait for the light to stop flashing before you could re-lock. This was a genuine software limitation, not a hardware issue. MY23 vehicles have not received this update as of early 2026.
The "change of mind" update was documented by the German YouTube channel Abenteuer4X4, not by official INEOS documentation. No corresponding TSB or release notes have been published by INEOS as of March 2026.
The Center Differential: Your Primary Traction Tool
The center diff lock is the most important and most underused feature on the Grenadier. It's mechanical (no electronics in the engagement path), works in both high and low range, and can be engaged at highway speeds as long as the front and rear axles are turning at similar speeds.
Routine when front & rear axles are at matched speeds. Owner reports range from 15 to 40+ mph.
Locks front-to-rear at equal distribution
Purely mechanical dog-clutch engagement
The owner's manual states the transfer case should be shifted while stationary and in neutral. In practice, center diff lock engagement at speed is routine among owners when front and rear axles are turning at matched speeds — reports range from 15 mph to 40+ mph regularly. The L2SFBC driving guide recommends locking the center diff for all off-road surfaces, with low range under 40 km/h.
Sources: TheINEOSForum, L2SFBC Guide
When to lock it: Any time you leave paved road. Gravel, dirt, rain-soaked surfaces, snow, sand. It costs you nothing except the inability to corner on dry pavement without drivetrain binding. Many owners lock it preemptively at the first sign of reduced traction.
When to unlock it: Back on dry pavement, or when cornering on high-grip surfaces. If you feel binding or hopping in tight turns, unlock it.
The Electronic Cross-Axle Lockers: What Goes Wrong
The Eaton E-Lockers use an electromagnetic solenoid, activated via a dash switch, inside the differential carrier. When disengaged, the differential operates as a standard open diff. When engaged, it provides 100% lock — both wheels on that axle turn together with no slip. Press the button, the solenoid fires, and a locking ring engages pins that tie the side gears together. The mechanism itself is proven and used across many platforms. But the way INEOS has integrated it with the vehicle's electronic systems creates some specific problems.
Actuation: Electromagnetic solenoid, dash-switch activated
Operating mode: Open differential when disengaged; 100% lock when engaged
Max engagement speed: ≤3 mph (per Eaton specs)
Max speed while engaged: ≤20 mph — Eaton states the locker "should not be maintained at speeds greater than 20 mph"
Warranty period: 1 year against manufacturing defects
Warranty void conditions: Engagement above 3 mph or during high wheel spin voids warranty — damaged engagement pins or lock collar are classified as "improper use"
Source: Eaton E-Locker FAQ
ECU behavior related to locker engagement, indicators, and traction control interaction may vary by software version. INEOS has pushed OTA updates that change locker logic, so the behaviors described here may not match every vehicle identically.
Issue 1: Disengagement on Direction Change
This is the most commonly reported field problem. Owners observe single-wheel spin (meaning a locker has disengaged) after switching between forward and reverse, even though the dashboard shows lockers as engaged.
The cause appears to be a known characteristic of the Eaton E-Locker design: the locking ring can momentarily disengage for approximately half a wheel rotation when the direction of axle rotation reverses. This is documented in Jeep community forums where the same Eaton E-Locker is used. On those platforms, it's considered a known behavior, not a defect. But on the Grenadier, where owners are frequently rocking back and forth in technical terrain, it becomes a real operational issue.
Workaround: Minimize forward/reverse transitions with lockers engaged. If you must reverse, expect a brief loss of lock and accelerate gently through it.
Warranty coverage for the direction-change disengage behavior has not been publicly clarified by INEOS. No formal fix or TSB has been issued as of March 2026.
Issue 2: Disengagement on Engine Restart
The ECU resets locker state on ignition cycle. If you stop to scout an obstacle and kill the engine, your lockers disengage and need to be re-engaged before you tackle it. This catches people out in convoy situations where vehicles are stopping and starting frequently.
Workaround: If you're on a technical section, leave the engine running when you stop to scout. Or accept the re-engagement delay and plan for it.
Issue 3: Engagement Difficulty on Pavement / Hard Surfaces
The lockers engage by sliding a ring over pins while the differential carrier rotates. On hard, high-grip surfaces, there's very little differential rotation between left and right wheels (both have equal traction), so the pins can't align. This isn't a fault. The lockers are designed for off-road use where some wheel slip is present.
Test procedure: Find a gravel lot or dirt road. Engage low range and center lock first. Creep forward at walking speed while pressing the rear lock button. This gives the differential enough rotation for the pins to mesh. Don't test on dry pavement and then assume the system is broken.
Issue 4: Transfer Case Engagement Problems
Some of the reported "diff lock" issues are actually transfer case issues. The mechanical lever that controls the center diff and low range requires deliberate, firm input. If the teeth aren't aligned, the lever will resist or grind. Stop, let the vehicle roll a few inches, and try again. Some owners find that engaging while rolling at walking pace (1-2 mph) works better than engaging at a dead stop, though this contradicts the official manual guidance.
Speed Restrictions
| Configuration | Max Speed | Range | Notes |
|---|---|---|---|
| Center Diff Locked | Highway speed (owner-reported at 40+ mph) | High or Low | No cornering on dry pavement (binding) |
| Center + Rear Locked | ≤20 mph while engaged | Low | Engage at ≤3 mph per Eaton specs. Do not exceed 20 mph while engaged. Eaton FAQ |
| All Three Locked | Crawl speed | Low | No tight turns. Steering will be heavy. Same ≤20 mph limit applies. |
Hill descent control is disabled when cross-axle lockers are engaged. The system works by individually braking wheels, which isn't possible when the differential is locked. If you need hill descent control, disengage the cross-axle lockers first.
Common Mistakes
What Goes Wrong
- Testing lockers on dry pavement, then assuming they're broken
- Skipping the center diff lock and going straight to rear/front
- Engaging front locker when rear alone would suffice
- Panicking when lights flash (it's normal)
- Turning off the engine mid-obstacle with lockers engaged
- Forgetting the two-press confirmation for off-road mode
- Trying to disengage while stationary on soft ground
What to Do Instead
- Test on gravel or dirt while moving slowly
- Always engage center first, it's your foundation
- Center + rear handles 90% of situations
- Flashing = "confirming," not "failed"
- Keep engine running on technical sections
- Get used to the double-press in your driveway
- Drive forward with a gentle turn to help disengagement
Do You Actually Need the Cross-Axle Lockers?
If you're still deciding: spec them at build. No aftermarket locking differential exists for the Grenadier's Carraro axles, and vehicles with lockers consistently bring higher resale values. If you skip them at order, you likely can't add them later.
That said, this is the most debated question in the Grenadier community. The honest answer beyond the resale argument: it depends on what you do with the vehicle.
The Case For Lockers
- No aftermarket option currently exists. The Carraro axles are specific to the Grenadier, and no third-party locking differentials are available yet. If you don't spec them at build, you may never get them.
- Resale value. Vehicles with lockers consistently sell for more. Multiple forum members cite this as the primary reason to spec them.
- Towing off-road. The one scenario where experienced owners consistently say lockers matter. Heavy loads on slippery surfaces require instant, full traction.
- Technical terrain. Rock crawling, deep ruts, and severe cross-axle situations where traction control alone isn't enough.
The Case Against
- Center lock + technique covers most situations. Experienced off-roaders who ran Defenders and Land Cruisers for decades without cross-axle lockers report the Grenadier is at least as capable as those vehicles.
- Electronic complexity. The E-Locker system adds failure modes that a purely mechanical system wouldn't have. Some owners have experienced engagement errors, dashboard alarm cascades, and transfer case issues that required dealer service.
- Cost at build. Money that could go toward tires, training, or recovery gear.
Decision Matrix
| Your Use Case | Recommendation |
|---|---|
| Highway + occasional gravel | Skip — center lock is enough |
| Weekend trails, moderate terrain | Spec them — resale value alone justifies it |
| Towing off-road | Yes — the one scenario owners unanimously agree on |
| Rock crawling / technical terrain | Yes — traction control can't replace locked axles here |
Traction Beyond Lockers
Differential lockers are one tool in a larger traction system. Several factors determine whether you make it through an obstacle, and the lockers are only one of them.
Tire Pressure
Airing down from highway pressure (35 psi) to off-road pressure (18-22 psi) increases the tire contact patch significantly (up to 75% or more depending on starting and ending pressures). That wider footprint provides more grip, more flotation on soft surfaces, and better conformity to rocks. Many experienced off-roaders report that proper tire pressure does more for traction than lockers in most conditions.
Reducing pressure from 35 psi → 20 psi increases contact area by ~75% (35 psi ÷ 20 psi = 1.75× the contact area)
The Grenadier community's standard off-road pressure is around 25 psi, with some going lower on sand (15-18 psi). Always carry a compressor for re-inflation.
Momentum and Line Selection
The Grenadier weighs approximately 2,700 to 2,800 kg (5,950 to 6,170 lbs) depending on configuration. That mass is an asset when managed correctly. Controlled momentum through an obstacle often matters more than which lockers are engaged. Read the terrain, pick a line that keeps as many wheels on good ground as possible, and carry enough speed to get through soft sections.
Recovery Gear
When lockers, technique, and tire pressure all fail, recovery gear gets you out. Rated recovery points, a kinetic recovery rope or winch, and proper mounting for extraction equipment are the final layer of off-road capability. Having this gear accessible and properly secured matters as much as having lockers.
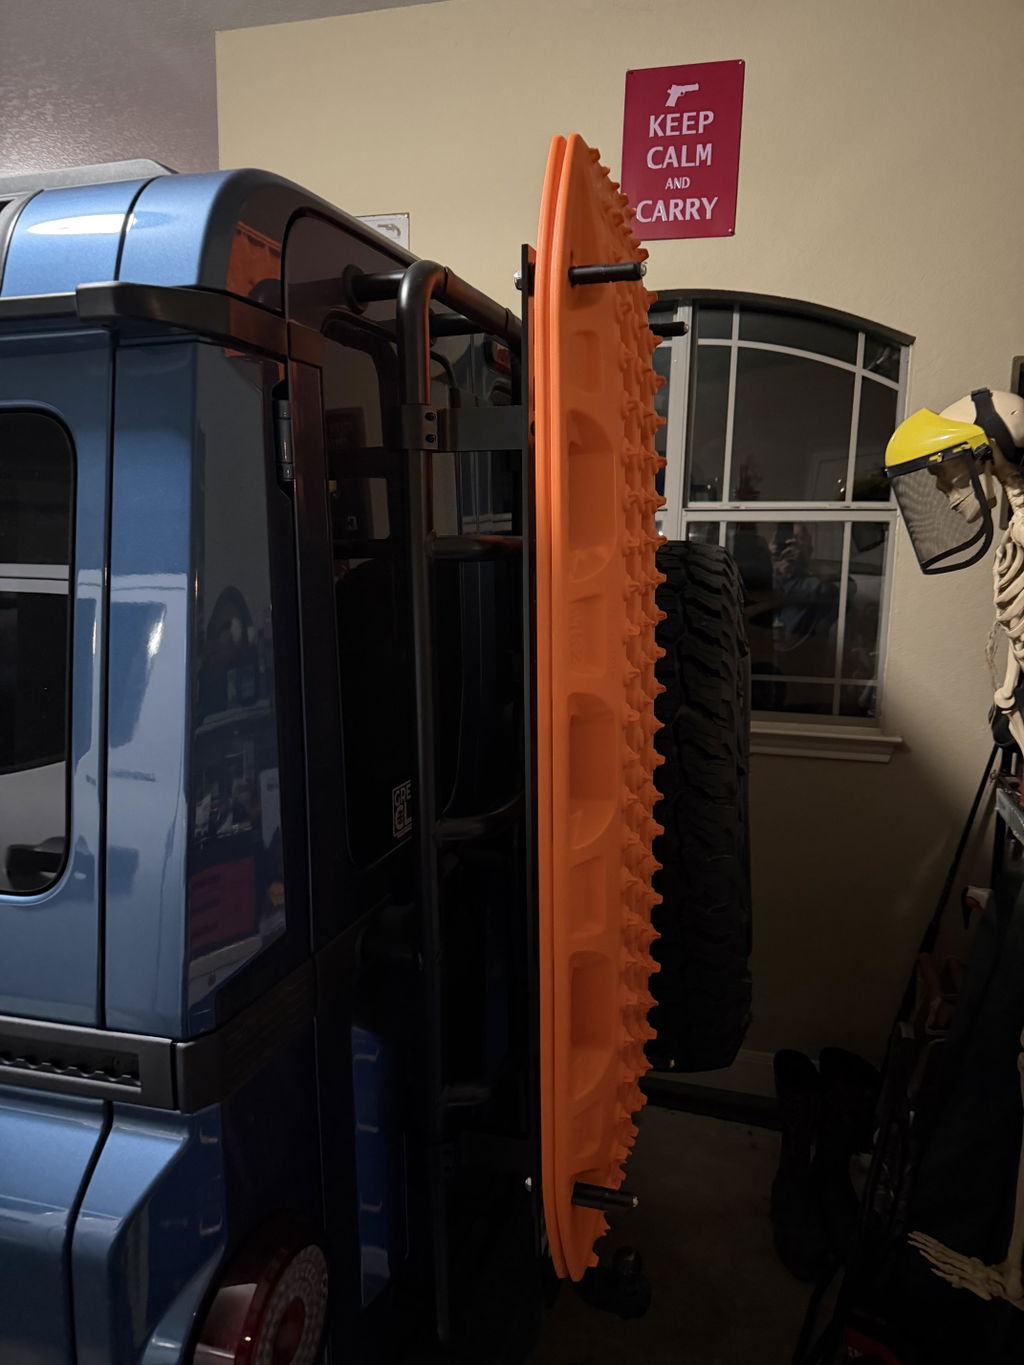
Traction boards in particular pair well with the locker workflow — engage lockers, fail to climb, deploy boards, succeed on the second attempt. The trade-off is where to mount them: roof storage adds height and weight; loose in the cargo bay slows access. Owners who run lockers regularly tend to land on rear-ladder mounting for the fast access without losing roof real estate. The DVA Ladder-Mounted Recovery Board Carrier is the bolt-on solution we engineered for this exact workflow — zero-rattle, tool-free quick-release pins, and the ladder stays climbable with the boards removed.
For extraction scenarios requiring more than boards alone, a Hi-Lift jack is the universal off-road recovery tool — ratchet lift to free a stuck axle, use as an off-road hand winch, or spread recovery straps. The DVA Ladder-Mounted Hi-Lift Jack Carrier keeps it accessible without using interior space or roof weight budget.
Preparation and Weight Distribution
How you load the vehicle affects traction directly. Weight over the axles increases tire grip. Weight that's too high raises the center of gravity and reduces stability. The goal is even distribution, low center of gravity, and secure mounting.
Roof cargo, recovery equipment, spare tires, and heavy accessories all change the vehicle's weight balance. Planning where this weight sits matters for traction, handling, and safety on challenging terrain. Two practical levers for keeping the center of gravity low while still carrying gear: keep the heaviest items (water, fuel cans, recovery boards) off the roof and onto the body sides via the DVA Gen 2 Side Accessory Carrier, and reserve the roof for low-density items mounted to a low-profile rail like the DVA DualTrack™ Roof Crossbar System (~1" profile, 5 lb/bar). Less weight up high means more grip down low, and the lockers have less work to do.
When your weight distribution is right, you're less dependent on the lockers to get you through.
Quick Reference Card
| Situation | Configuration | Range | Tire Pressure |
|---|---|---|---|
| Highway / Dry Pavement | All unlocked | High | Highway (32-36 psi) |
| Gravel / Dirt / Light Snow | Center locked | High | 25-30 psi |
| Moderate Trail / Wet Clay | Center + Rear locked | Low | 22-25 psi |
| Technical / Rock Crawling | All three locked | Low | 18-22 psi |
| Deep Sand | Center locked (rear optional) | Low or High | 15-18 psi |
| Towing on Slippery Surface | Center + Rear locked | Low | Per load rating |
Continue Your Build
Related DVA engineering guides for Grenadier owners:
- Tire Selection Engineering Guide — tire sizing, load ratings, and tread patterns for on- and off-road use
- Expedition Preparation Checklist — systems check and gear planning before heading off-grid
- Overland Build Planning & Weight Budget — payload math, weight distribution, and accessory prioritization
- Roof System Architecture Decision Framework — rails, racks, crossbars, and load path engineering
Sources & References
- Eaton E-Locker FAQ — engagement speeds, warranty, operating specs
- Carraro — INEOS Grenadier Axles — axle manufacturer, configurations
- INEOS Media — Grenadier Utility Wagon — differential ratio, vehicle specs
- Tremec — INEOS Grenadier Production — transfer case specs
- TheINEOSForum — Locking/Unlocking Centre Diff While Moving
- L2SFBC — INEOS Grenadier High, Low and Locked Guide
- TheINEOSForum — Front and Rear Differential Locks How-To